Showing posts with label Clothing. Show all posts

12.8.12

DIY Floral Printed Shorts

This season I have been drawn to prints, especially floral prints. There are tons and tons of varieties of prints to choose from but to me summer just shouts FLOWERS. After searching for an hour my friend and I finally found the perfect fabric.


Stuff you need:
A pair of shorts that fit you well (Just for measurement)
Floral fabric
Sewing Machine
Newspaper
Elastic

1. Fold your shorts in half and place them on the newspaper. Trace it using a pencil or chalk.


2. Leave a 2cm gap between the outline of the shorts and where you cut the newspaper. This is for seaming the shorts. You may or may not want to reduce the gap on the far straight side of your stencil depending on how snug you want the shorts to be.


3. Fold the fabric in half making sure the far straight side is on the edge. Pin it down and cut around it. Repeat this step twice, making sure the second time the you cut around the edge of the opposite side of the stencil.


4. Lay both pieces back to back like this.


5. Pin and sew down the curve of one side. Not all the way down.


6. Now fold over the top and bottom of the shorts and iron in place then sew. The top seam should be 1.5cm wider than your elastic.


7. Use a safety pin to thread the elastic through.


8. Pin and sew the other curves together.


9. Fold the shorts (still inside out) so that the two sewn seams are facing each other. Pin the unsewn straight edges together so that the edges facing each other are sewn together.


 Have fun showing off your new florals!


25.7.12

DIY Ombre Pocket Skirt

I found this tutorial in Singapore’s weekly Urban newspaper late last week. It had an entire section on DIY fashion. I was so excited I waited outside for the newspaper to be delivered. The tutorial was written by Singaporean fashion label Villiand+Lovers. The skirt is super simple and well explained. Since I didn’t have any polka dotted fabric at hand when I found the tutorial I decided to go with what I a meter of plain white fabric and 2 types of blue dye.


I retyped up the instructions because it isn’t so clear in the picture:

Stuff you need:
1 meter of white cotton fabric
2 colors of dye
Elastic
Sewing machine


1.     Measure your waist size and take 8cm to 10cm off it as the measurement for the width of the skirt. Measure your desired length. Then add 8 cm to 10cm to this.
2.     Trace four pocket patterns (below) measuring 19cm by 16 cm, on the remaining cloth.
3.     Pin one pocket pattern to each side of both pieces of cloth. Each pattern should be placed 13cm from the top of the fabric. The outside of the pockets should face each other must face each other. Using a sewing machine, sew the length of the skirt fabrics at 0.5cm from the edge.
4.     Lay the two skirt fabrics on top of each other, with the pockets flapping out. The outsides of the fabric should face each other. Sew along the edges of one side of the fabrics, 1 cm away from the hem before sewing it.
5.     By now, your skirt should form a rectangle. Spread your skirt out on an ironing board. Fold the bottom hem of the skirt and iron it. Use pins to hold down the hem before sewing it.
6.     The size of the waistband should be 1.5cm more than the actual width of the elastic band. Fold the top of the skirt to form the waistband using this measurement and iron. Sew the waistband.
7.     Repeat step 4 to close up the other side of the skirt fabric. Do not sew the waistband, as you need to allow room for the elastic to go in.
8.     Secure a safety pin to one end of the elastic and pull it through the waistband loop. Remove the pin after it has gone through and sew the ends of the elastic together. Flip the skirt over and it is ready.

And here is a dip dye tutorial by Rit dye.


Have fun DIYing!


20.6.12

DIY Simple Strapless Dress

Now that summer is officially here it is the perfect time for all s's: swimming, smoothies, sunglasses and strapless dresses. This tutorial is an easy and inexpensive way to get your own strapless dress.

The result of this dress all depends on the fabric you choose. I was fortunate enough to come across an amazing summery floral while strolling through the fabric store the other day. I fell completely in love with it bought it immediatly.


Stuff you need:
1 meter of fabric
Elastic
Sewing machine (needle and thread will do)

1. Iron the fabric.


2. Measure around above your chest, under your arms. Add 10cm to this measurement. Find the center of the top of the fabric, this should also be where the center of you measurement is. Cut from the sides of the measurements to the bottom corner of the fabric. It should now form a trapezoid.


3. Fold the fabric in half and pin the sides together. Then sew them together.


4. Now fold the top of the dress inwards. The seam should be large enough for the elastic to fit inside. Sew in place and leave a gap to put the elastic through.


5. Cut the elastic so that is 7 cm shorter than the initial measurement you took at the beginning of this tutorial. Use a safety pin to pull the elastic through. Sew the 2 ends of the elastic together and close the seam.


6. Last but not least trim the dress to your desired length and fold to make a seam.


Now that you've got yourself a new basic, dress it up and have fun wearing it all through summer!

2.5.12

DIY Under Sleeve Tie-Dye Top

Tie-dying is definitely one of the best DIY activities ever created. It's fun and can be used in so many ways. Another benefit of tie-dying is that you will always be original, but that is basically a benefit from all DIY's. Tie-dye is special because you can experiment with original prints.


Stuff you need:
Plain white tee
Rubber bands
Dye

1. Collect fabric beneath the sleeve of the tee.


2. Dye the fabric then remove the neck.


This is a close-up of the print. Have fun tie-dying!


18.4.12

DIY Noodle Skirt

Even though I am not a big fan of them, my inspiration for this DIY were  frayed crop tops. I love the way the t-shirt material hangs when cut into several strips and sort of curls into a 'noodle'. I've seen many DIYers play with that technique to create necklaces, belts and all kinds of fun stuff but I wanted to do something different. So I decided to bring the frayed from the frayed crop top to the bottom half, in skirt form.


Stuff you need: 
Plain t-shirt
Jersey skirt
Needle and thread or sewing machine

1. Remove the top part of the tee and cut the rest of it into several strips at 2 cm intervals. The cutting lines are shown below.


2. Pin the strips to the skirt.


3. Sew them on. Make 2 rows of stitches to be secure.


4. You can either trim the 'noodles' or tie knots at the end of them to make them shorter.


Enjoy!


11.3.12

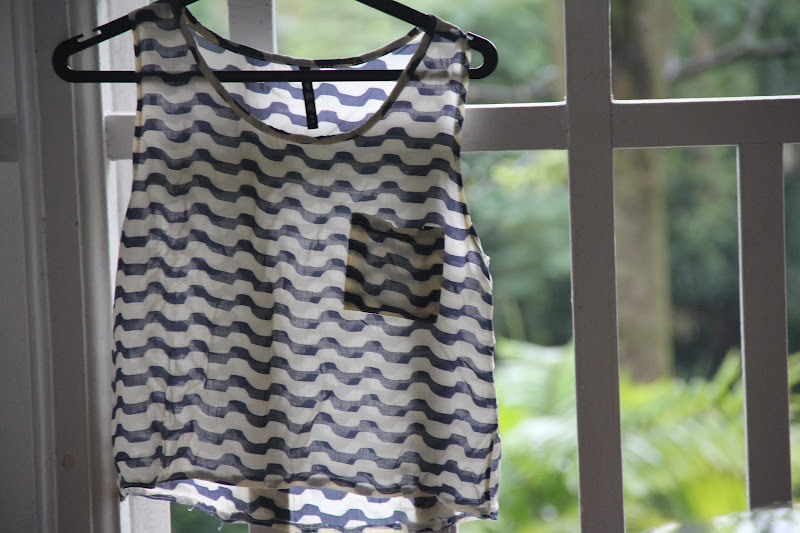
Before and After: Striped Crop Top

First off let me just say this fabric is insanely pretty, don't you think?


I began with this thrifted dress which had quite an awkward waist line. But I loved this fitting of the top half of the dress and knew it would be perfect as a crop top.


 I had thrifted this dress at a second hand market for $2 a couple of weeks ago. One thing you ought to know about me is that I find it really strange wearing 2nd hand clothes unless I have cut them up in one way or another. Otherwise I just won't wear it.


So I cut it in half.


Then I decided to do a sort of fishtail effect by making the back a bit longer than the front.


I am incredibly pleased with the result but still am not sure what to do with the left over fabric, don't want to make it a skirt. Any ideas?

22.2.12

Before and After: French Knotted Skirt

I thrifted this dress from a 2nd hand market a couple weeks ago and only just got around to 'repairing it'. At the time I didn't think twice before buying it since it was only $4. But after trying it on I realized that the dress was incredibly ill-fitting and dirty at the top although it does look quite dainty.


But the main reason I had bought it in the first place was because I fell in love with the fabric, off-white and dotted with french knots.


So I removed the top half of the dress, added some elastic and turned it into this:


Still delicate, but actually fitting this time.


1.2.12

DIY Tribal Print Dress

I absolutely hate making clothes using patterns, and that is why I love this dress. It is so easy to make and pretty too, plus you don't have to follow a pattern.

I have seen these dresses being worn just about everywhere, so I wanted one for my wardrobe too. This dress looks best in tribal printed fabric but if you want you can use another light weight fabric.


Our dresses:


Stuff you need:
2 meters of tribal printed fabric
Sewing machine (needle and thread will take a while)
Elastic 4 cm less than the size of your waist
Safety pin

1. Begin by folding the fabric in half width wise. The fabric usually comes pre-folded like this. Measure the length between your shoulders and about add 30 cm to that. Mark that amount at the top of the folded fabric. Draw a line from both marks to the bottom corners, as shown below.


2. Fold the sides inwards. Pin and sew in place. 


3. Next, fold the fabric inside out and sew the sides together. Leave space for armholes on both sides.


4. Turn the fabric right way round, then cut a hole on the fold for your neck. Pin and sew.


5. Trim the bottom of the dress to your preferred length. Cut a strip 3 cm wide from this excess fabric. Turn the dress inside out and sew on both sides of the strip around the dress where you want your elastic to be. Using a safety pin pull you elastic through strip.


Have fun DIYing!