Showing posts with label T-shirt recon. Show all posts

2.5.12

DIY Under Sleeve Tie-Dye Top

Tie-dying is definitely one of the best DIY activities ever created. It's fun and can be used in so many ways. Another benefit of tie-dying is that you will always be original, but that is basically a benefit from all DIY's. Tie-dye is special because you can experiment with original prints.


Stuff you need:
Plain white tee
Rubber bands
Dye

1. Collect fabric beneath the sleeve of the tee.


2. Dye the fabric then remove the neck.


This is a close-up of the print. Have fun tie-dying!


18.4.12

DIY Noodle Skirt

Even though I am not a big fan of them, my inspiration for this DIY were  frayed crop tops. I love the way the t-shirt material hangs when cut into several strips and sort of curls into a 'noodle'. I've seen many DIYers play with that technique to create necklaces, belts and all kinds of fun stuff but I wanted to do something different. So I decided to bring the frayed from the frayed crop top to the bottom half, in skirt form.


Stuff you need: 
Plain t-shirt
Jersey skirt
Needle and thread or sewing machine

1. Remove the top part of the tee and cut the rest of it into several strips at 2 cm intervals. The cutting lines are shown below.


2. Pin the strips to the skirt.


3. Sew them on. Make 2 rows of stitches to be secure.


4. You can either trim the 'noodles' or tie knots at the end of them to make them shorter.


Enjoy!


19.2.12

DIY Braided T-Shirt Belt

I really love things that are perfectly imperfect, rugged at the edges. That's why I love this belt, plus it's really fun to make. They look best in bright colors, they'll stand out more.
This belt can be worn as a necklace or headband but I prefer it in belt form.


Stuff you need:
5 cm wide strip from the bottom of a t-shirt

1. Cut the strip so that it is no longer a circle


2. Draw vertical lines along the entire strip at 2 cm intervals


3. Cut on the lines, make sure to cut like shown below


4. Now it gets complicated, bring the piece on the furthest side under the second one


5. Bring the 3rd piece through the first one. Continue to bring the next piece through the one before...


Until it looks like this


6. Cut 2 small strips of t-shirt material and tie them to the ends of the braid


Pretty funky right?


29.1.12

DIY Block Print Tie-Dye

Before I begin I have to admit that this tie-dye was a fluke. When I started I didn't know what I was doing or how I was going to do it. I only knew it was going to be a tie-dye. So that's the reason why it's called 'block print tie-dye', I wasn't sure what to call it. But it is pretty cool right?

Stuff you need:
T-shirt
Dye
Rubber bands

1. Lay out your t-shirt


2. Roll one half of the shirt diagonally


3. Roll the other half inwards


4. Tie several rubber bands along the entire roll


5. According to the instructions on the dye packet, dye the rolled up t-shirts


Remove the rubber bands and dry the shirt. I cut off the collar and shortened my t-shirt because it was a large mens size.

Is this amazing or what?


18.1.12

DIY Loose Fitting Cardigan


I am not entirely sure whether this is a cardigan or not because google failed to inform me. So I have decided to call it a cardigan anyway. 


When I started this project with a long sleeved shirt I was hoping for something more cardigan-like. But half way through it hit me that this was not going to turn out like I had planned. Lesson learned: large shirts do not make for very good fitting cardigans. Regardless I am still very pleased with the result!

Stuff you need:
Large t-shirt (I only used a long sleeved shirt because I liked the color of it)
Needle and thread (sewing machine is preferable)
Embroidery floss (optional)


1. Remove the neckline and shorten the length of the tee to your preferred length. Fold inwards and pin.


2. Sew both the bottom of the tee and the neckline in place.


3. Cut straight down the middle of the tee. Fold inwards, pin and sew in place.


4. If you are using a long sleeved tee shorten the sleeves and make a seam.


I embroidered the neckline only because I was in the mood to embroider something, but you could also add buttons or a ribbon.


4.1.12

A Day Of DIYing + 4 DIY's

My friend and I had been planning this day for so long! We had a whole list of things planned but only managed to really finish 4. We actually spent 2 whole days DIYing: a day, a night and another day. But it was so much fun! Below are the results and how to make them.

The DIY Tie Dye Top
Stuff you need:
Plain t-shirt
Dye
Rubber Bands

1. Bunch up a bit of the shirt.
2. Tie a rubber band at the bottom of the bunched up bit.
3. If you want you can add 1 or 2 more rubber band to a few of the bunched up bits.
4. Repeat steps 1-3 and cover up the entire shirt.
5. According to instructions in your dye packet dye the fabric.
6. Once the fabric is dry remove the rubber bands and iron.

I really love this method of tie-dye because it is so much more wearable than the multicolored ones, yet still fun to make.


The DIY High-Waisted Dress

We found this amazing tutorial at Talk To The Trees. Below are just a few photos showing how we made the dresses.


The DIY Adjustable Ring 
Stuff you need:
Water hose grip
Pliers
Screw driver

1. Begin by placing the water hose grip on a flat surface.
2. Hold the grip with pliers and pry it open using a screw driver.

The ring is adjustable so you can wear it on any toe or finger that you want. At the bottom of the ring there will be a small hole, possibly a place for a jewel or embellishment.


The DIY Lace Headband
Stuff you need:
Elastic lace
Needle and thread

1. Put the lace around your head and tighten until you feel it fits right. Cut 2 cm more than where it fits right.
2. Sew the 2 ends together and wear.

I love lace. 

12.10.11

DIY 2 Color Pocket Tee

What's the point of shirt pockets? Old men in suits use them for handkerchiefs and pens. Apparently they were first invented so that you could keep business cards close to your heart... strange. Personally I prefer it when shirt pockets are empty, brightly colored, and worn by women.

I like the photos above way better than this, but I have to admit his mustache pretty cool.


So, it is time for yet another DIY.


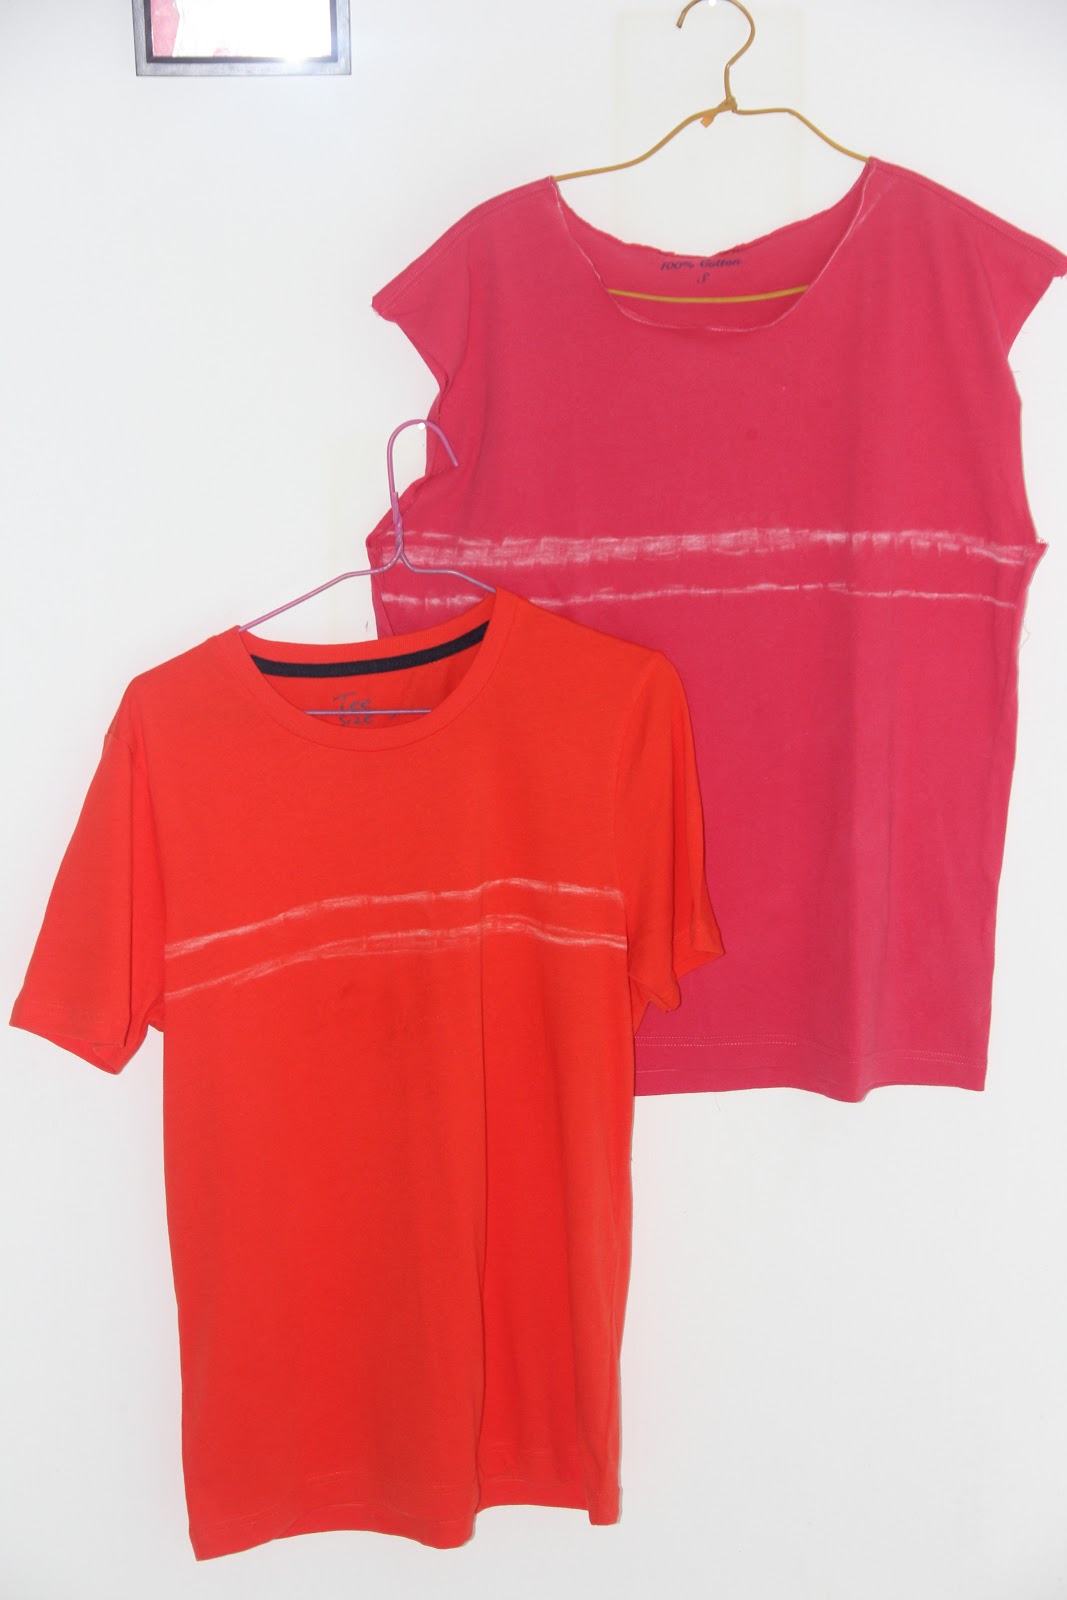
The white stuff is chalk that I forgot to dust off. Whoops!

Stuff you need:
2 oversized t-shirts
Chalk
Sewing machine (needle and thread will do, but it will take 10 times longer)
Seam ripper

1. Start off with your 2 t-shirts. The pink one is A and orange, B.


2. Using a seam ripper remove the sleeves t-shirt A. Be careful not to rip the fabric.


3. Then cut off the neck of the t-shirt A.


4. Afterwards pin the raw edge of the neck inwards and sew in place. (t-shirt A)


5. On each t-shirt draw a line where you want the 2 colors to meet. On t-shirt A draw another line 4 cm below. Cut on this line. And on the t-shirt B draw a line 4 cm above. Cut on this line.


6. Next, decide how large you want your sleeve to be. You may decide to turn the fabric inwards to this. Mark it by make a line with some chalk. Draw another line 3 cm to the side. Repeat this step on both sleeves.


7. Cut on the line closer to the edge.


8. Using a seam ripper, split t-shirt B into 2 pieces of fabric.


9. Pin t-shirt B to t-shirt A so it looks like below. Then sew the fabric together.


10. Next, turn the tee is inside out and pin then sew the sides together. Make sure to leave space for the sleeves.


11. This time turn the tee the right way out. Turn the raw edge of the sleeves inwards. Pin and sew.


12. Finally, the shirt pocket. Using a piece of chalk draw a shirt pocket of your preferred size on excess fabric from t-shirt B. Draw a line around it for seam allowance. Cut it out and turn the fabric above the pocket inwards. Pin and sew.


13. Pin the pocket onto the tee and sew.


Finally! Ta-daa!