12.8.12

DIY Floral Printed Shorts

This season I have been drawn to prints, especially floral prints. There are tons and tons of varieties of prints to choose from but to me summer just shouts FLOWERS. After searching for an hour my friend and I finally found the perfect fabric.


Stuff you need:
A pair of shorts that fit you well (Just for measurement)
Floral fabric
Sewing Machine
Newspaper
Elastic

1. Fold your shorts in half and place them on the newspaper. Trace it using a pencil or chalk.


2. Leave a 2cm gap between the outline of the shorts and where you cut the newspaper. This is for seaming the shorts. You may or may not want to reduce the gap on the far straight side of your stencil depending on how snug you want the shorts to be.


3. Fold the fabric in half making sure the far straight side is on the edge. Pin it down and cut around it. Repeat this step twice, making sure the second time the you cut around the edge of the opposite side of the stencil.


4. Lay both pieces back to back like this.


5. Pin and sew down the curve of one side. Not all the way down.


6. Now fold over the top and bottom of the shorts and iron in place then sew. The top seam should be 1.5cm wider than your elastic.


7. Use a safety pin to thread the elastic through.


8. Pin and sew the other curves together.


9. Fold the shorts (still inside out) so that the two sewn seams are facing each other. Pin the unsewn straight edges together so that the edges facing each other are sewn together.


 Have fun showing off your new florals!


5.8.12

Photo Diary: Bali - Part 2

As promised these are the rest of the photos from my trip to Bali. They were all taken with a disposable water proof so they're a bit fuzzy. From shipwrecks to corals, enjoy!


25.7.12

DIY Ombre Pocket Skirt

I found this tutorial in Singapore’s weekly Urban newspaper late last week. It had an entire section on DIY fashion. I was so excited I waited outside for the newspaper to be delivered. The tutorial was written by Singaporean fashion label Villiand+Lovers. The skirt is super simple and well explained. Since I didn’t have any polka dotted fabric at hand when I found the tutorial I decided to go with what I a meter of plain white fabric and 2 types of blue dye.


I retyped up the instructions because it isn’t so clear in the picture:

Stuff you need:
1 meter of white cotton fabric
2 colors of dye
Elastic
Sewing machine


1.     Measure your waist size and take 8cm to 10cm off it as the measurement for the width of the skirt. Measure your desired length. Then add 8 cm to 10cm to this.
2.     Trace four pocket patterns (below) measuring 19cm by 16 cm, on the remaining cloth.
3.     Pin one pocket pattern to each side of both pieces of cloth. Each pattern should be placed 13cm from the top of the fabric. The outside of the pockets should face each other must face each other. Using a sewing machine, sew the length of the skirt fabrics at 0.5cm from the edge.
4.     Lay the two skirt fabrics on top of each other, with the pockets flapping out. The outsides of the fabric should face each other. Sew along the edges of one side of the fabrics, 1 cm away from the hem before sewing it.
5.     By now, your skirt should form a rectangle. Spread your skirt out on an ironing board. Fold the bottom hem of the skirt and iron it. Use pins to hold down the hem before sewing it.
6.     The size of the waistband should be 1.5cm more than the actual width of the elastic band. Fold the top of the skirt to form the waistband using this measurement and iron. Sew the waistband.
7.     Repeat step 4 to close up the other side of the skirt fabric. Do not sew the waistband, as you need to allow room for the elastic to go in.
8.     Secure a safety pin to one end of the elastic and pull it through the waistband loop. Remove the pin after it has gone through and sew the ends of the elastic together. Flip the skirt over and it is ready.

And here is a dip dye tutorial by Rit dye.


Have fun DIYing!


23.7.12

Photo Diary: Bali - Part 1

Bali is absolutely brilliant. It will always remain as one of my favorite holiday destinations. Not only is it skirted by some of the world's most beautiful beaches but also has some amazing scenery up on its hills. Rich in food and culture, Bali will never cease to amaze me. The island also has some fabulous shopping locations. Apart from the expected Billabongs and Rip Curls there are some pockets around the location with amazing pieces by both local and foreign designers. I wish I could have explored Bali more, but I spent most of my time underwater with a wetsuit and a tank on my back. I went scuba diving. Most of the photos I took are on my underwater film camera and are being processed at the moment so I will share that with you guys later. Enjoy!


16.7.12

Inspiration: Rope

These are a couple of very inspirational photos that will get your DIY creative juices flowing. Although rope is most commonly used for necklaces these photos show other ways you can use rope in. Enjoy!


5.7.12

Before and After: High-Waisted Piped Shorts

Here's an idea for another pair of shorts to add to your summer wardrobe. Pipe them. Not only do they look cool but also have a sort of nautical vibe, perfect for the current season. 


I began with a pair of off-white capri's that I picked up at the thrift store for $2. After some bleaching, snipping and sewing I welcomed my new pair of shorts with open arms.


The inspiration for these shorts took place amidst last weeks episode of Jane By Design. I loved her shorts but decided to change the colors up a bit.

Jane By Design

Hope everyone is having a great summer. Enjoy!


28.6.12

DIY Key Ring Pendant

Oh how I love staring through the glass windows of Tiffany and admiring the beautiful bajillion dollar pieces of jewelry. With their rings to bracelets to necklaces, Tiffany never fails to take my breath away. These were definitely a unique idea and I loved them. So I bought some key rings and tried to make them on my own.


If you want you could use assorted sizes and colors of key rings or you could just keep it simple like I did.


Stuff you need:
Several key rings
Necklace chain


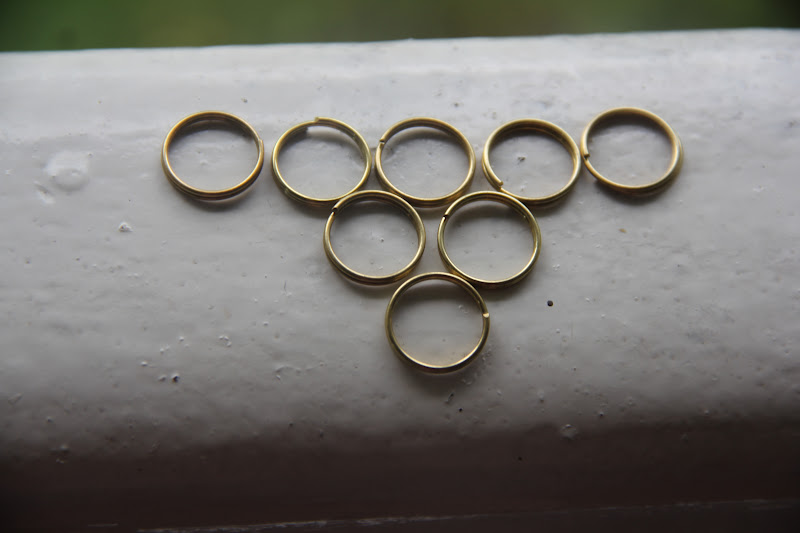
1. Lay out the rings in the form of the pendant.


2. Begin by attaching just 2 together like you would a normal key ring.


3. Then attach the rest of the rings.


Attach to a necklace chain and wear!

p.s. Check out this post where queenoffunkydiy was featured on.