Showing posts with label Hair Accessories. Show all posts

28.3.12

DIY Giorgio Armani Inspired Flowers

These big bold flowers are pretty fantastic don't you think? And they looks so great on those suits.


As soon as I saw them I knew they could easily be made out of ties. Tie prints are perfect for this tutorial so I used one of my dad's old ties and played around with the folds. Still deciding what I should use as the final product. Have fun folding ties!


Use these as brooches, attach them to headbands or for anything else you can think of.

4.3.12

DIY Hair Cuff

Say goodbye to scrunchies and hair tie's to welcome in a new era of hair accessories: the hair cuff. Although it still has to be worn with a hair tie underneath I am quite confident that this accessory is a brilliant replacement for the hair tie. It's stylish, modern and wearable.

Tumblr
I was looking for more of a imperfect hair cuff, something crumpled maybe so here is my take on the hair cuff:


Stuff you need:
A sheet of aluminum
Wire
Spray paint

1. Cut the sheet of aluminum foil so the length is enough to go around a ponytail and width is about 5 cm.


2. Spray paint it whatever color you want. I think gold would look really good, but currently don't have any in my stash of spray paint. Meanwhile place your wire in hot water to make it more pliable.


3. Fold the edges inwards.


4. Place your wire lengthwise on the foil and fold the foil until it is one strip.


 5. Bend it so that it is in the shape of a cuff. Then bend both the wire ends so that they form hooks.


All there is left do is wear with style!


4.1.12

A Day Of DIYing + 4 DIY's

My friend and I had been planning this day for so long! We had a whole list of things planned but only managed to really finish 4. We actually spent 2 whole days DIYing: a day, a night and another day. But it was so much fun! Below are the results and how to make them.

The DIY Tie Dye Top
Stuff you need:
Plain t-shirt
Dye
Rubber Bands

1. Bunch up a bit of the shirt.
2. Tie a rubber band at the bottom of the bunched up bit.
3. If you want you can add 1 or 2 more rubber band to a few of the bunched up bits.
4. Repeat steps 1-3 and cover up the entire shirt.
5. According to instructions in your dye packet dye the fabric.
6. Once the fabric is dry remove the rubber bands and iron.

I really love this method of tie-dye because it is so much more wearable than the multicolored ones, yet still fun to make.


The DIY High-Waisted Dress

We found this amazing tutorial at Talk To The Trees. Below are just a few photos showing how we made the dresses.


The DIY Adjustable Ring 
Stuff you need:
Water hose grip
Pliers
Screw driver

1. Begin by placing the water hose grip on a flat surface.
2. Hold the grip with pliers and pry it open using a screw driver.

The ring is adjustable so you can wear it on any toe or finger that you want. At the bottom of the ring there will be a small hole, possibly a place for a jewel or embellishment.


The DIY Lace Headband
Stuff you need:
Elastic lace
Needle and thread

1. Put the lace around your head and tighten until you feel it fits right. Cut 2 cm more than where it fits right.
2. Sew the 2 ends together and wear.

I love lace. 

16.11.11

DIY Black Headband

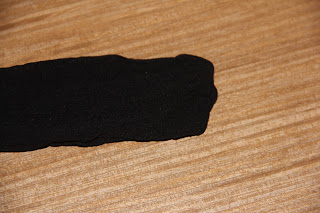
It may not be high end fashion. But a simple black headband is just a comforting accessory that can worn just about anywhere, at anytime and in anyway. 

This would have to be the easiest tutorial I have ever done.

Stuff you need:
Stockings (You can get a packet of 5 for less than $5 at any convenience or pharmaceutical store)


1. Cut one stocking off a pair of stockings.


2. Cut off the other end of the piece you removed so you have a tube.


It should look like this.


3. Put your hands through the tube and stretch it out.


You can adjust it to whatever width you want. Ta-daa!

21.10.11

DIY Vintage Hair Pins


I saw a  few pins similar to this in a store a few days ago and I loved them... but they were $25 EACH! I didn't even have that much pocket money left. So I decided to do a DIY. It took me while to figure out how to make them but I think I finally got it right.


It turned out quite nicely, elegant yet slightly imperfect... just the way I like it. That's what is so alluring about most vintage things, they may have a faded photo, a broken corner or a piece missing. With all this they still manage to charm.

Stuff you need:
Plain Hair Pin
Metal Embellishment (preferably rounded) 
Bronze/Gold Paint
A Tiny Printout Of An old Portrait (I got mine from here)
Crafting Pearls
PVA Glue

1. Start by painting your hair pin and metal embellishment bronze/gold. I found it easier to paint the pin when it was pinned to a sheet of paper, this will also make sure paint does not go in between the pin. 


2. To make the embellishment seem a little more vintage I dabbed it with a scrap of cloth. Round the edges of your tiny portrait printout and glue it in the center of the embellishment.


3. Cover the entire photo in PVA glue. This will create a layer and protect the photo. Plus it makes it look more vintage.


4. Surround it with pearls. You don't need any extra glue for this.


5. Glue the pin to the back of your embellishment. 


Ta-daa!