Showing posts with label Wrist-wear. Show all posts

11.4.12

DIY Neon Watch

It may be a tad messy but I still love this watch. The bright neon brings that pop that everyone will be searching for this summer. Fluorescents are one of the most refreshing colors and with summer just around the corner you should start stocking up on those fluorescent pieces and what better way to start off than with the bare necessity of organization, the watch. 


Having a contrasting buckle is optional but I feet the contrast harmonizes the entire accessory. 


Stuff you need:
An old or cheap plastic watch
Neon spray paint
Masking paint


1. Cover the parts of the watch that are not going to be sprayed with masking tape.


2. Preferably on a large sheet of newspaper spray paint the entire watch. For a more even coating, spray several thin layers of paint rather than one heavy coat. Remove the masking tape carefully.


Last but not at all least show off your new neon watch.


14.3.12

DIY Buckled Friendship Bracelets

Here is a snapshot from of a page from my look book which is filled with all the inspiration for this DIY project. The original idea came from the friendship bracelet buckles I saw in the recent spring 2012 HnM catalogue. I really like the idea because they make friendship bracelets seem more clean and expensive. I still love the messy authentic friendship bracelets with loose threads hanging out at the ends but why have an occasional change?


This bracelet does not necessarily have to be made using a friendship bracelet, I used it because it was a part of my inspiration. You could use fabric, rope etc.


Stuff you need:
A buckle
Needle and thread
Fray stop/Glue
Friendship bracelet/Fabric/Rope etc. ( This material will need to be able to wrap around your wrist 1.5x)
Pin

1. Use the pin to make a hole near the end of your bracelet.


2. Place the pointy part of the bracelet through the hole.


3. Push both parts of the bracelet that are on either end of the buckle through the buckle.


5. Trim the excess fabric or string and sew them both together.


6. Trim the excess string on the other end of the bracelet too and create a few holes on that end using the same technique used in step 1.


And that is it :)


p.s. These look best worn in bulk.

11.12.11

DIY Nicole Miller Inspired Textile Bangles

I first spotted these bangles in my December/January edition of Teen Vogue and knew they would be perfect for a DIY tutorial. That's why I love Teen Vogue and Vogue and almost any other fashion magazine, they are always stuffed with inspiration for DIY.


Here are the Nicole Miller versions:


And here is mine:


Stuff you need:
Wooden/plastic bangle
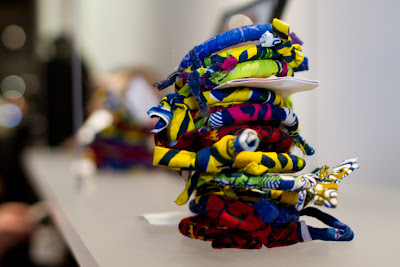
Long strip of patterned/printed fabric


1. Leave about 12 cm of excess fabric.


2. Wrap the fabric around the bangle.


3. Once you have finished wrapping the bangle tie a bow with the excess from the end and the beginning of the fabric.


Ta-daa!


17.10.11

DIY Burberry Prorsum Inspired Bracelet

Burberry Prorsum.
Prorsum is Latin for ahead.
Burberry Prorsum's spring 2012 RTW collection is ahead in so many ways.

Aren't they bewitching? Every piece was conceived so brilliantly that I couldn't take my eyes off a single model Burberry Prorsum sent down the runway. I especially love the fresh use of color and pattern.
From style.com
And this is what the line inspired me to DIY...


I have always wanted to do a b&w tutorial and I thought this one looked quite cool in b&w.

Stuff you need
Fabric, Beads, Ribbons (whatever you want to use)
A strip of fake leather (do not kill animals for clothing!)
Needle and Thread

There was an old fake leather pouch lying around so I though I would rip it up and use some of it for the tutorial.


1. Choose what materials you want to use and put them together to make your bracelet. (Top tip: LAYER, LAYER, LAYER)


2. Once everything is stuck together thread a needle, knot the end and sew through one end of the bracelet. cut and repeat on the other end. 


Tie it round your wrist and ta-daa!


2.10.11

DIY Golden Beaded Bangle


So, I began this project thinking I would be making a headband... But somehow I took a complete detour and it turned out as this:
Stuff you need:
Wire
6-8 beads of your choice
Yarn
Glue
Needle-nose pliers

1. Begin by cutting your preferred length of wire that fits around your wrist and place it in a bowl of warm-hot water. This way it will be easier for you to shape the bracelet with a pair of needle-nose pliers.


2. Then put the wire through the beads. Make sure that at least 1 bead has gone through both wire ends so that the circle is held in place.

2. Next, take your yarn and knot it next to the bead that is on both wire ends.


3. Take some glue and rub it along the wire. Knot the yarn when you get a little less than a quarter of the way through the circular wire. Cut the yarn and repeat three more times.

Ta-daa!