28.3.12

DIY Giorgio Armani Inspired Flowers

These big bold flowers are pretty fantastic don't you think? And they looks so great on those suits.


As soon as I saw them I knew they could easily be made out of ties. Tie prints are perfect for this tutorial so I used one of my dad's old ties and played around with the folds. Still deciding what I should use as the final product. Have fun folding ties!


Use these as brooches, attach them to headbands or for anything else you can think of.

21.3.12

DIY Fabric Printing

These DIY(s) were inspired by a wide range of African prints and since fashionista.com did a post on  the upcoming African designers I thought this would be a perfect time to also share some of those designers with you all that I loved. 

Omaka Osakwe

Kezia Frederick

William Okpo

The following DIY(s) were mainly inspired by these bold prints which made me want to do some fabric printing, an easy way to update those solids and pastels for the upcoming spring/summer season.

Stuff you need:
Fabric paint
Basically anything you can use to print. I used a cotton bud, a felt butterfly and a homemade cardboard stamp.


Use your printing supplies and fabric paint to print on whatever fabric.


It's fun and looks great.

18.3.12

Inspiration: Ribbon Shoes

Below are great examples of fun ways to add ribbons to those flats, platforms and heels. They are all quite easy to create. 


Sonia Rykiel
I know these have inspired you so start DIYing now!

14.3.12

DIY Buckled Friendship Bracelets

Here is a snapshot from of a page from my look book which is filled with all the inspiration for this DIY project. The original idea came from the friendship bracelet buckles I saw in the recent spring 2012 HnM catalogue. I really like the idea because they make friendship bracelets seem more clean and expensive. I still love the messy authentic friendship bracelets with loose threads hanging out at the ends but why have an occasional change?


This bracelet does not necessarily have to be made using a friendship bracelet, I used it because it was a part of my inspiration. You could use fabric, rope etc.


Stuff you need:
A buckle
Needle and thread
Fray stop/Glue
Friendship bracelet/Fabric/Rope etc. ( This material will need to be able to wrap around your wrist 1.5x)
Pin

1. Use the pin to make a hole near the end of your bracelet.


2. Place the pointy part of the bracelet through the hole.


3. Push both parts of the bracelet that are on either end of the buckle through the buckle.


5. Trim the excess fabric or string and sew them both together.


6. Trim the excess string on the other end of the bracelet too and create a few holes on that end using the same technique used in step 1.


And that is it :)


p.s. These look best worn in bulk.

11.3.12

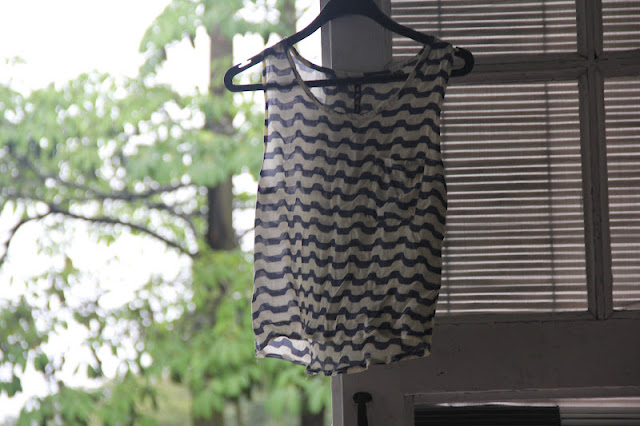
Before and After: Striped Crop Top

First off let me just say this fabric is insanely pretty, don't you think?


I began with this thrifted dress which had quite an awkward waist line. But I loved this fitting of the top half of the dress and knew it would be perfect as a crop top.


 I had thrifted this dress at a second hand market for $2 a couple of weeks ago. One thing you ought to know about me is that I find it really strange wearing 2nd hand clothes unless I have cut them up in one way or another. Otherwise I just won't wear it.


So I cut it in half.


Then I decided to do a sort of fishtail effect by making the back a bit longer than the front.


I am incredibly pleased with the result but still am not sure what to do with the left over fabric, don't want to make it a skirt. Any ideas?

7.3.12

Inspiration: Zippers

You have to be quite daring to upgrade something with a zipper because if you get it wrong it will turn out terrible, however if you get it right it will turn out quite spectacularly. 


Designed by Valerie Mayen, Project Runway S8 ep 2


I hope these photos have inspired you in one way or another, my creative DIY juices were definitely flowing after looking at these photos!

4.3.12

DIY Hair Cuff

Say goodbye to scrunchies and hair tie's to welcome in a new era of hair accessories: the hair cuff. Although it still has to be worn with a hair tie underneath I am quite confident that this accessory is a brilliant replacement for the hair tie. It's stylish, modern and wearable.

Tumblr
I was looking for more of a imperfect hair cuff, something crumpled maybe so here is my take on the hair cuff:


Stuff you need:
A sheet of aluminum
Wire
Spray paint

1. Cut the sheet of aluminum foil so the length is enough to go around a ponytail and width is about 5 cm.


2. Spray paint it whatever color you want. I think gold would look really good, but currently don't have any in my stash of spray paint. Meanwhile place your wire in hot water to make it more pliable.


3. Fold the edges inwards.


4. Place your wire lengthwise on the foil and fold the foil until it is one strip.


 5. Bend it so that it is in the shape of a cuff. Then bend both the wire ends so that they form hooks.


All there is left do is wear with style!